Monday, December 10, 2012

tis the season to...

Tis the season to... get my act together and decorate this house.  With my dad being in the hospital, Thanksgiving, going out of town and being busy in general, I haven't gotten much Christmas decorating started done.  This is the first Christmas with our snow-white fireplace and I wanted to make a new, wintery center piece.  I love the chevron canvas I made but it does not represent the season.


I really like the size of the chevron canvas and thought I would do something similar.  I went to Michael's to buy a canvas and luckily they had them on sale for 60% off.  (I feel like if you ever buy anything for full price at Michael's, you are a silly person.  Most things are on sale or you can download a 40% off coupon on your smartphone while you're perusing the store).  The canvas ended up only being $15.00.. score!


I decided that my masterpiece 4th grade art project would be a snowflake.  I felt like it was less cheesy than a Christmas tree or snowman or a Santa.  My original game plan was to paint a snowflake on top of a solid-colored canvas.  Then, I thought, I am not a patient person nor does it take much for me to get frustrated so let's avoid WWIII in the Feldmeyer house and use painter's tape instead.  I decided to use painter's tape to make the snowflake so that I wouldn't even have to paint the intricate design.  Keep it simple, stupid. 

I also grabbed some paint at Michael's.  I was debating whether to do a subtle light grey or a deep cranberry.  My designer colorblind husband said to go with cranberry.  (Gosh, another reason why I love that man.  He plays along with my decorating adventures and actually has an opinion.)  I had my coupon on my phone and since 60% off is more than 40% off (har har), I used the 40% off coupon for the paint.  It ended up being $10.00 for both paint colors.


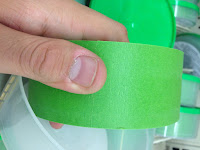
Now, for the tape - I've heard that the Frog Tape is the best.  Ehren ran to the hardware store for me because obviously I had already changed into my most unflattering sweats and slippers.  These are the pics I got:


We went with the first one because it was the thinnest - I figured if I wanted thicker lines, I could just overlap the tape.  Other than the paint and the canvas, these were my only other supplies.


I hopped on Pinterest to look for snowflake inspiration.  I found this pin and picked out the snowflake below to go off of.  It didn't go exactly like the picture but that's okay, it was just a pinspiration.


And so it began.  I decided to angle the tips of the snowflake.  Even though I'm a perfectionist, I knew I couldn't make this a perfect snowflake.  Every snowflake is unique, right?


I decided it was starting to look like an Aztec-y snowflake (is that even possible?) and I liked it!  But before I started liking it, I hated it.  I had a mini-meltdown (meltdown, get it?) in the middle of the taping process because I thought it looked stupid.  But then when it was done, I was happy.


I pushed down around all the borders to prevent paint from seeping through.


Next, time to mix the paint.  Red + black = cranberry.  I was worried I wouldn't have enough paint so I made a lot and it actually turned out just right.


Our conversation went like this:

Jamie:  Does this look right?  Does it look cranberry?
Ehren: Yea, it looks just right.
Jamie: Why am I asking you?  You're colorblind!


 Now for the easy part - painting!


The instructions on the tape say to remove the tape immediately and so I did.  Which is good, because I was way too impatient to wait until the next morning to remove it.


Please ignore my grossly hyperextended elbow.


Ta-da!  I let it dry overnight to avoid getting cranberry paint on my white fireplace and put it up the next morning.


If you know me by now, you know that I love contrast, I love simple, clean, contemporary design without feeling cold - even if it's a picture of a snowflake.  I'm excited to have a winter-themed canvas now and I'm starting to ponder what other canvas I could create for other times of the year.  (Suggestions appreciated!)  This project took about an hour and a half from start to finish.  If you do this, don't get frustrated.  You can easily remove the tape and change your design as you go, like I did.

Now, I'm off to make clam chowder and put up the Christmas tree.  We put up our Christmas village this past Saturday and I will blog about that soon.  Happy decorating!

Tuesday, December 4, 2012

this year, i am thankful for...

...Blood clots and biscuits and gravy.  Sounds weird, right?  Let me explain.

I've been M.I.A. in the blogging world (and house cleaning world, and laundry world, and exercising world) because of my dear dad.  It all started with calf pain at the beginning of November that later turned into a cold, pale foot.  He went to the ER to get it checked out - it was an arterial blood clot that landed in his leg.  He had surgery to remove the blood clot that night and therefore save his leg.  This prompted a full work-up that was long overdue - as in, he hadn't seen a doctor since he was drafted for the Vietnam War in 1969 (!!!).

He spent 4 days at the hospital in Lawrence where I work, and I joked with everyone that it was "take your dad to work day".  While at LMH he went through numerous tests to find out where this blood clot came from.  They found that he had multiple silent heart attacks that damaged a large part of his heart and later causing the clot.  I hoped that his heart could be fixed with a heart catheterization and stents, but the doctor said he needed bypass.

On election night, he was transferred to KU Hospital and Friday he finally had his surgery.  Quadruple bypass.  My dad is a "healthy" guy who exercises vigorously everyday, eats better than I do but unfortunately had genetics against him.  But I'm thankful for that blood clot and where it landed.  It left his heart, made its way around the bend of the aorta without going up to his brain where he could have suffered a massive stroke or death, and went down to his leg.  He's got the luck of the Irish with him.  (And lots of prayers and positive thoughts.. thank you, everyone).  


Two weeks after going into the ER, he was discharged from the hospital, just in time for Thanksgiving.  Normally, my dad smokes the turkey out in the Weber, but this year was going to be a little different.  We made homemade pizzas instead and it was a lot less stressful than a 22 pound turkey with all sides.  All that mattered to us was that we were together, who cares what we ate?


One of my dad's specialties is biscuits and gravy from scratch.  I have childhood memories of waking up on weekend mornings to the smell of B&G and the sound of either Car Talk on the radio or Meet The Press on TV.  I loooove his biscuits and gravy and I haven't found anything else to compare.  So, this Thanksgiving I was thankful that my dad was here (and alive) to teach me how to make B&G myself.

We spent most of Thanksgiving break in Kansas City at my grandma's house.  The first step of this ordeal was to grab my favorite coffee mug at her house and pour some java. 


I think for the first time ever, my dad's famous recipe was officially written down on paper. 


The man, the myth, the biscuit making legend, my dad. 


Biscuits
  • 5 cups all purpose flour
  • 5 teaspoons powder
  • 1 teaspoon baking soda
  • 1 teaspoon salt
  • 1 stick of butter
  • Enough buttermilk until the dough holds together
Gravy
  • 1 lb good quality breakfast sausage
  • olive oil if the sausage is lean
  • flour until the sausage turns to paste and there is no liquid fat anymore
  • milk until thickened and boiling, then to your desired consistency
Whisk the dry ingredients together, then take the cold stick of butter and break it up in the dry ingredients until all the butter is in pea-sized chunks.  Then add the buttermilk until the dough holds together.  Roll out flat, about 3/8" to 1/2" thick.  Take a drinking glass that is about 2 1/2" around and cut the biscuits.  Place on baking sheet and cook at 450 degrees for 10-12 minutes until golden brown on top.
Cook the breakfast sausage in a 3 qt. sauce pan or a large skillet, breaking it up into small chunks.  Depending on how much fat the sausage renders, you may have to add olive oil to it (a few tablespoons).  Sprinkle flour little by little to the sausage until it makes a paste and the liquid fat is gone.  Then start adding milk until it thickens and boils.  Then continue to add more milk until it is to your desired consistency.  
Then, as my dad would say, grab a plate and growl!

Not only did we have a big family get together, we also had a dog fest.  Five dogs that is.

Chalmers, Bruno, Cozy, Winnie, Rudy


Many people posted what they were thankful for on Facebook throughout November and everyday, I thought to myself "my dad".  I'm also thankful for all of our family and friends, doctors, nurses, aides, everyone.  I'm thankful that he is alive to teach me how to make biscuits and gravy.  And I'm thankful that we've spent so much time together over the last month.  He's doing really well now and has started cardiac rehab.  He never lost his wit and humor, even while he was in the hospital.  In fact, when he was wheeled off to go to surgery, he exclaimed, "so long, suckers!".  And while we were in the ER not knowing what he would go through over the next two weeks, we had a conversation like this:

Me:  So, does this mean you're going to start going to the doctor now?
Dad:  Yes.......... every 40 years. 


the black plague, part III: front door

Now the black plague has moved to the front door.  While I think the "rustic" and "distressed" look has its place, I do...

Blog design by Get Polished | Copyright 2016