Monday, January 14, 2013

gettin' fresh in the kitchen

Made with Shapely

As in "making fresh pasta".  Get your mind out of the butter gutter.  In addition to the big ass cutting board I got for Christmas, I also got a couple new cookbooks, one being Cook's Illustrated - it's been pretty amazing so far.  I'm always looking for new recipes, and this one has 2,000 in it.  All worth repeating.  We Feldmeyers like to reward ourselves with food, much like you would a dog.  We eat pretty healthy and exercise regularly during the week and always like to have an indulgent meal to look forward to at the start of the weekend.  Last Friday, we went to hot yoga and while I was sweating my brains out (if you've done Bikram, you know it's possible to sweat your brains out) I was thinking about the pasta we were going to make that night.  And I could tell Ehren was, too.  Thinking about fresh pasta was what got me through that torture chamber inferno class.  Anyway, like I've mentioned before, we love stay-at-home dates.  You get to wear sweats, pick your own music, and bring your dog.


When we do our date night meals, I'm okay with spending a little more time preparing them.  When I was perusing my new cookbook, I found a section dedicated to fresh pasta and stuffed pasta, like ravioli and tortellini.  I remember making pasta growing up.  We would make fettucini and instead of using a fancy drying rack like the one pictured below, we would lay out brooms and mops and let the pasta dry that way.  Sanitary?  Probably not.  Successful?  Definitely.


We have a KitchenAid stand-mixer but no attachments.  I would love to have all the pasta making attachments like the picture above, but when your mom has attachments and offers to drop them off on your doorstep, why spend the money right now?  Thanks, Mom!  As for the filling, we decided on a proscuitto, squash, parmesan, sage mix.  The recipe had me at proscuitto.

There really isn't much to pasta - flour and eggs.  As easy as cooking can get if you ask me.  Mix it up in a food processor until it combines, knead, shape into a ball, and let it rest.


Chop up some proscuitto and sage.


Add roasted butternut squash, parmesan, nutmeg, eggs and mix.


Roll out the pasta until you can see your hand through it (I went until setting 4).


Why, yes, my skin is whiter than pasta.  Thanks for asking.


Lay it out on damp dish cloths and cover so it doesn't dry out.


Form the mix into little balls and place 1 1/4" inches apart then fold the pasta over.


Form the pasta around the filling so there are no air bubbles then cut the pasta.  We don't have a pastry roller so we just used the pizza cutter and it worked fine.


Lay out on floured cookie sheets and cover with damp dish cloth.  Then place in boiling water for a few minutes until done.  It obviously doesn't take as long as dried pasta so keep an eye on it.


Since the filling is so complex and flavorful, the sauce didn't need to be.  I made a pine nut, butter, and parsley sauce.  Simple and delicious.


Mix it all together in a serving dish and enjoy!


Let me tell you, this was amazing.  The proscuitto gave it a salty bite while the sweet butternut squash balanced it out.  Ehren loves to order pasta when we go out to dinner but is always disappointed on the small portions - he was not disappointed this night.  We can't wait to make this again but maybe try different fillings and sauces.

Making your own pasta sounds scary and like it's a lot of work, but it really isn't anymore work than making something like enchiladas.  Anything worth eating takes a little time and the longer it takes, the more wine you can drink in the process.  And when you have that hot yoga high, Pandora going, dim lighting, and good company, who cares if you don't eat until 9:00?

Well, Cozy cares, here he is begging asking, "Mom, can you make some ravioli stuffed with peanut butter and dog treats?"


Saturday, January 12, 2013

bathroom progress: backerboard

Made with Shapely

It's been a while since I blogged about our bathroom.  I think now is the time... especially since we've picked up the pace recently now that life has settled down a little bit.  The bathroom nightmare project started back in April (ugh, has it really been that long?) when we ripped out our moldy shower and after we were done freaking out, we got everything prepped.  Next thing on the to-do list was to make the shower walls with backerboard.  (Disclaimer: this is not a "how you should do it" blog, this is a "how we did it blog".  We went with the advice of the guys at The Tile Shop). 

We originally bought backerboard from Home Depot, but when we talked to our guy Leon at The Tile Shop, he recommended their product for about the same price as the HD. When we looked at their backerboard, we could tell it was higher quality so we decided to go with the Tile Shop brand called Perma Base.  Since the backerboard will butt up against drywall, it needs to be 1/2" thick.  Most backerboard comes in 3'x5' sheets and is very heavy.  We bought seven sheets and lugged them up the stairs, one piece at a time.


This stuff does not cut quite like drywall, it's a lot harder since it's basically concrete instead of gypsum (like drywall).  We got a backerboard cutter from The Tile Shop which helped with this.  Luckily we have a few extra bedrooms so we can spread out and make each room a "project room".  (Which will all eventually be re-done... of course).


And here is Cozy, always near the task-at-hand.  Along with Audrey.


We measured out the shower area and cut the backerboard to size, trying to make as few cuts as possible to use the least amount of backerboard sheets.


Cutting and hanging backerboard is hard work - not only is it hard to cut, it's hard to hang up since it's so heavy.  We secured the backerboard with... wait for it... backerboard screws!


We butted the backerboard up to the niches leaving enough space between to allow for silicone caulk.


We used paint sticks to separate the backerboard pieces to allow the thin set to join the segments together.


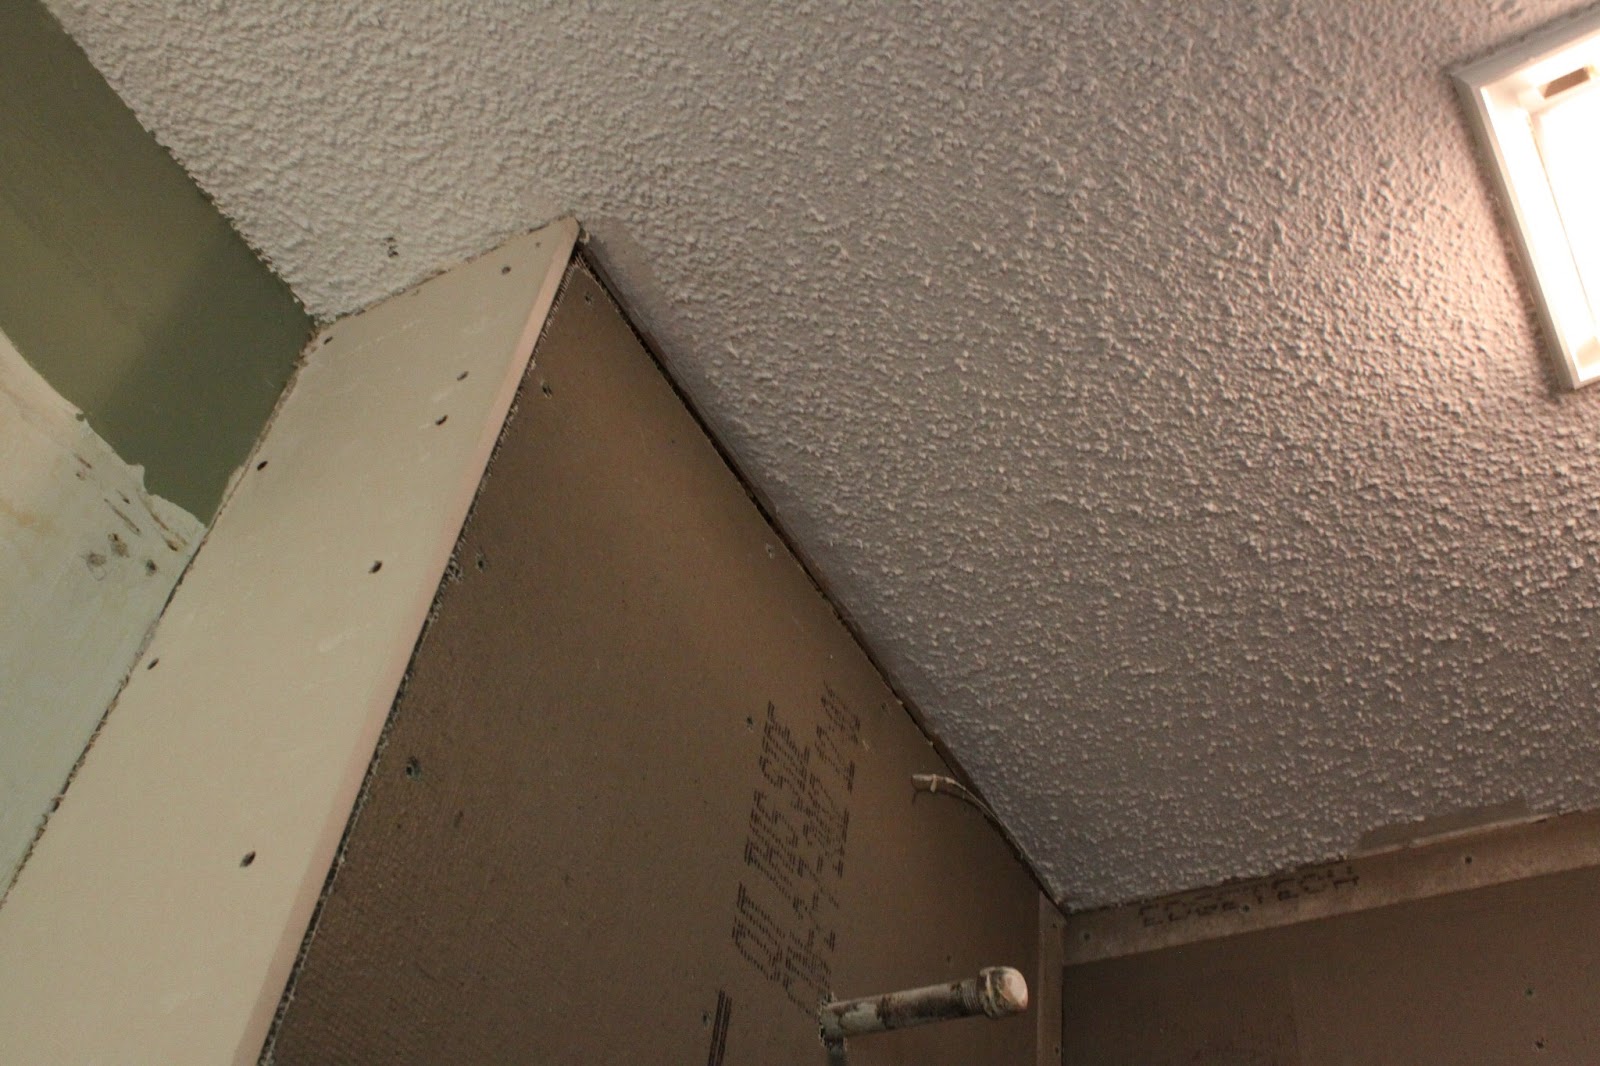
Walls!  We finally have walls instead of studs.


We caulked the backerboard/shower pan junction.


Ugh, popcorn ceiling everywhere in this house.  Not sure if we want to tackle that messy project.


This portion of the bathroom reno went pretty smoothly, next up is to tile the shower walls.  Eek!  Let's check out how our check-list is going...

  1. Rip out tile
  2. Remove old shower pan
  3. Remove and clean up mold
  4. Convert two shower knobs (hot and cold) to one
  5. Raise shower head from six feet high to seven
  6. Re-route PVC piping to allow room for shower niches
  7. Raise subfloor with new plywood so new shower pan will fit over drain
  8. Install shower pan
  9. Install and seal drain
  10. Install shower niches to studs
  11. Install backerboard
  12. Caulk between shower pan and backerboard junction
  13. Caulk and seal around shower niches
  14. Learn how to tile
  15. Start tiling
  16. Freak out
  17. Ask yourselves, "why are we doing this?!"
  18. Begin divorce papers
  19. Tile for hours and hours and days on end
  20. Wonder why and how people do this for a living
  21. Shred divorce papers because now we know what we're doing and love each other again
  22. Seal tile
  23. Grout tile
  24. Seal grout 
  25. Install shower door
  26. Caulk corners and seams
  27. Install shower head and knob
  28. Shower for the first time since April
  29. Shower again later that day... just because
  30. Remove vanity
  31. Remove toilet
  32. Remove light, light switches and mirror
  33. Rip out linoleum
  34. Rip out drywall and trim around door and window
  35. Move light switch and electrical outlet because they are in the way of the pocket door
  36. Install pocket door
  37. Drywall
  38. Paint (fun!)
  39. Apply backerboard to subfloor
  40. Tile floor (with less freaking out because we are pros now)
  41. Grout and seal
  42. Install toilet
  43. Assemble and install vanity
  44. Assemble and install medicine cabinet
  45. Update frameless mirror
  46. Install vanity light
  47. Put trim and baseboards back
  48. Crown molding?
  49. Buy fun, new accessories
  50. Bathroom dance party
The longer we use the shower in our other bathroom, the more I want to rip it out and re-do it.  Too bad you can't rush a bathroom renovation.  I hope everyone has a great Saturday - it's supposed to snow here (even though it was 60 degrees yesterday) and I'm pretty excited about it!

Thursday, January 3, 2013

our Christmas story: in pictures

Like most people, I'm kinda sad the holidays are over.  I look forward to the Christmas season all year long.  I love spending time with family, snow, decorating, eating, sweatpants, presents, Christmas music.  Here's a little of what went on..

First of all, some of our friends designed an app called Shapely and I pretty much love it.  We used it to make our very informal Christmas card that we sent out into Facebook/Twitter land.  You should download it. 


Christmas cookie decorating.


Cozy was eager to open his presents.


Coffee on Christmas morning - seriously, I could not think of a better way to enjoy my coffee.  Especially in my new carafe from my mom and sitting next to this leaf/feather that my sister got us. 


Could it get any cozier than this?


Why yes it can!  Our gift that keeps on giving, Mr. Cozy Feldmeyer.


What a tiring morning for our fur child.


My hubby got me another season to add to my collection.  This is seriously my most favorite television show of all time.  We laugh harder with this show than we do anything else on TV right now.  It's classic.


Then, Cozy started getting nosey and found his gift.


Then he opened it and ate it.  Who says opposible thumbs are necessary?


Ehren says "hi".


Christmas morning biscuits and gravy courtesy of Santa my dad.  Ehren says "cheers".


Cozy and Bruno played in the snow.. even though it looks like Cozy killed Bruno and is planning how to bring home his kill.


The only thing I really asked for, for Christmas, was "a big ass Boos Blocks cutting board".  My dad wrapped a very small cutting board and when I opened it, it said "Is this what you wanted?  Your cutting board is under the West end of your couch".  Sure enough, there was an 18" x 24" cutting board under the couch.  I was perplexed because I didn't notice my dad haul a 20 pound block into the house.  I asked, "how long has that been under there?!"  My dad replied, "oooh, since the 17th".  Yes, my Christmas present had literally been under my ass nose for over a week.  And what is crazy is that Cozy frequently kicks balls under the couch for me to retrieve, and that is also where I store my computer when I'm not using it. 


The boys got rechargeable LED flashlights.  They proceeded spotlight each of us when we talked and made everything a disco party.


We had Christmas dinner at my mom's house.


Nice buns.


Scotch and cigars... and 10 degree weather.


We went to my husband's hometown of Meade, Kansas for the New Year.  It snowed the most beautiful snow - I was in heaven. 


Cozy by the fire.


A friendly game of Mahjong.


Ehren poppin' bottles and looking... very... constipated focused.


Feldmeyer family pic: Me, Cozy, Ehren, Goudy, Seeley, Ava.


And, of course, another one of Cozy "angel face" Feldmeyer.  Here, he is saying, "do we really have to drive 6 hours back to Lawrence?"


I hope everyone had a Merry Christmas and a Happy New Year!  One of my resolutions is to blog more, how about you?

the black plague, part III: front door

Now the black plague has moved to the front door.  While I think the "rustic" and "distressed" look has its place, I do...

Blog design by Get Polished | Copyright 2016